
How to Cast Insects and Bugs in Resin
School holidays are the perfect time to get creative. The kids were given bug catching containers for Christmas, so were keen to catch bugs too. We spent part of our holiday getting close to nature in Margaret River. Many insects, frogs and bugs were caught. We photographed the live ones and released them back into the garden. The dead ones we kept to draw.
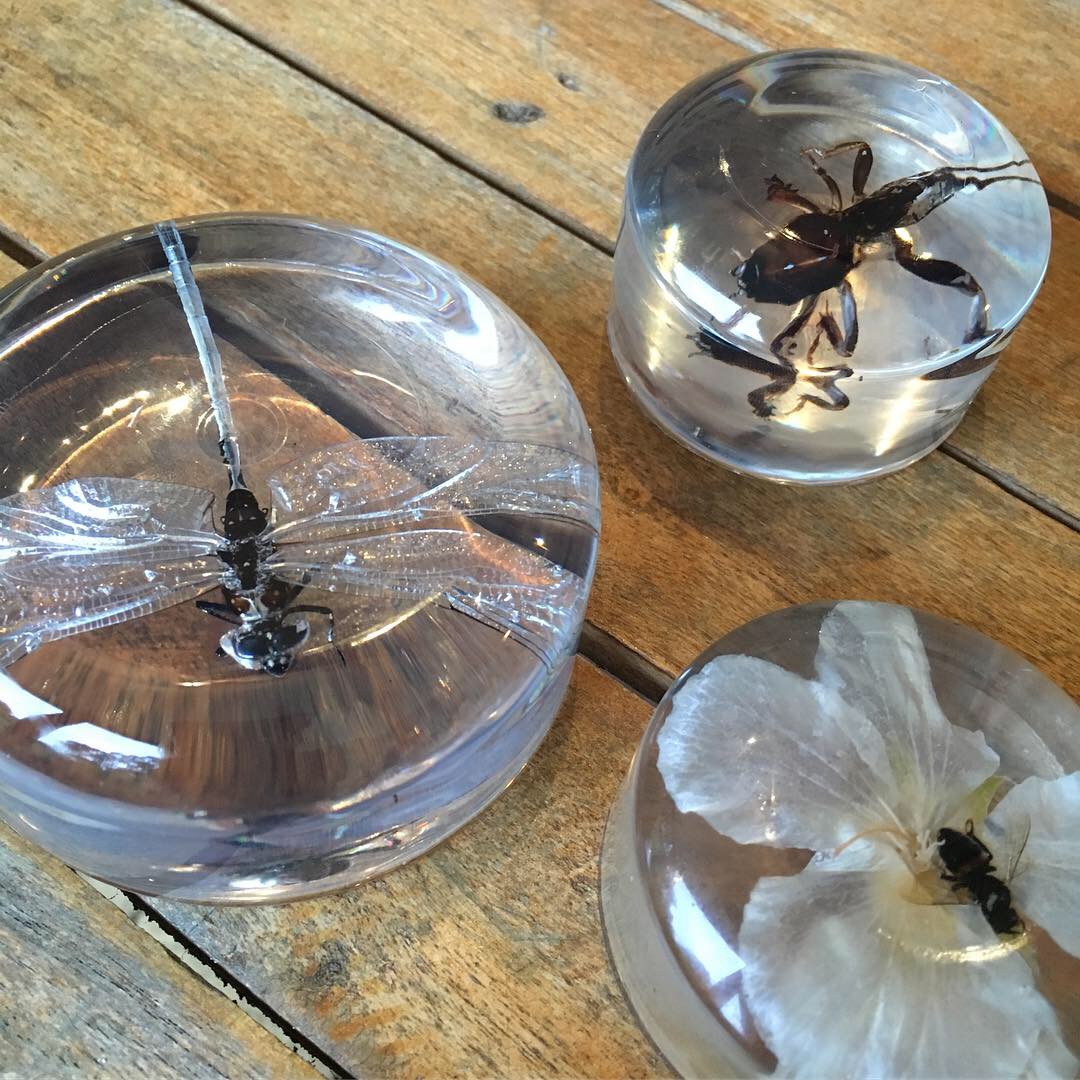
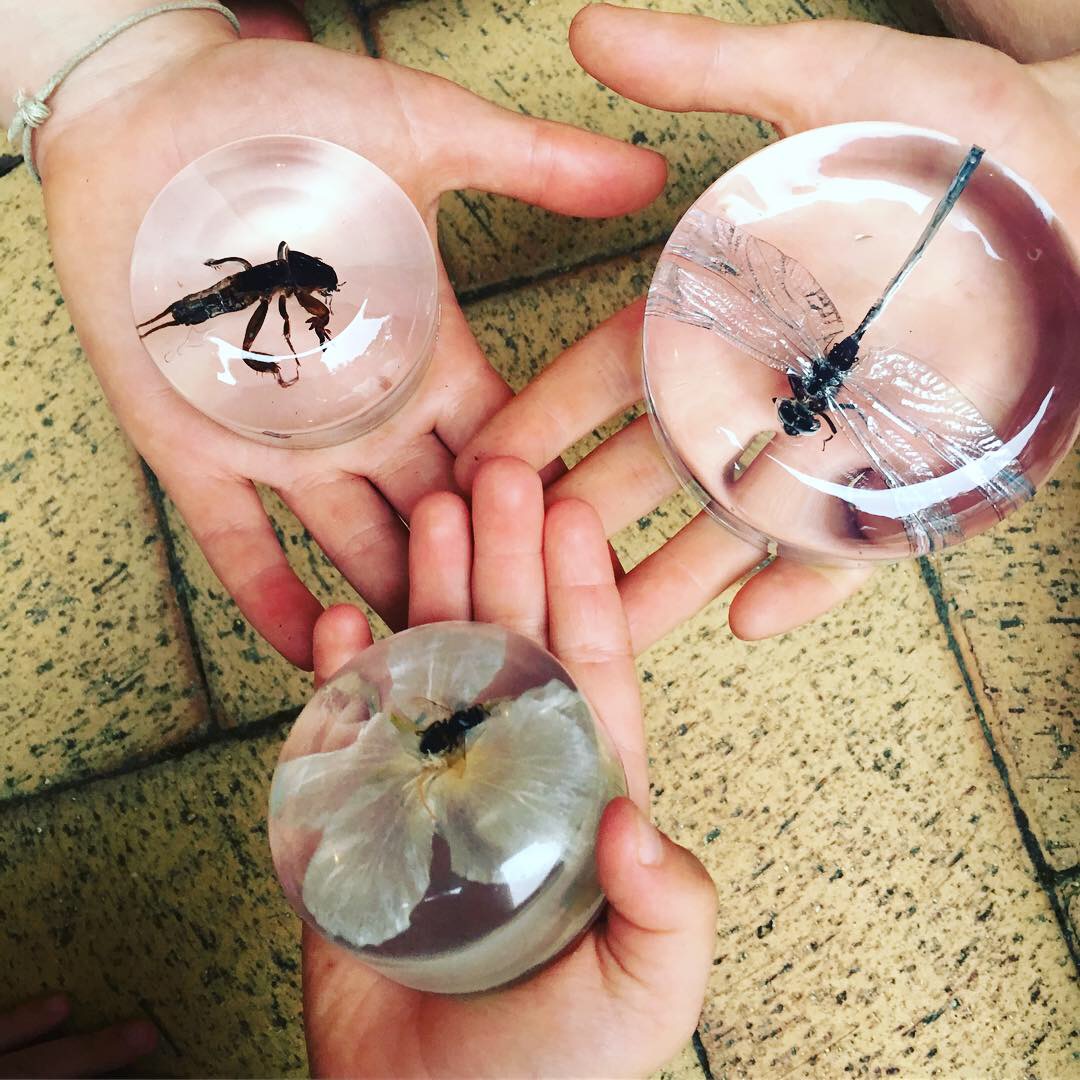
When the boys found a stunning (also dead) dragon fly, I wondered if we could preserve it in resin to keep. Like museum specimens or old-school paperweights.
After a trip to the hardware store and a few days of waiting patiently, we were thrilled with our resin cast insects.
Here’s what you will need:
RESIN & CATALYST: Buy a tin of CLEAR CASTING RESIN and a small bottle of RESIN CATALYST HARDENER. We bought ‘Protite Clear Casting & Embedding’ resin off the shelf from Bunnings. I had to ask for the catalyst as the store kept it behind their paint desk.

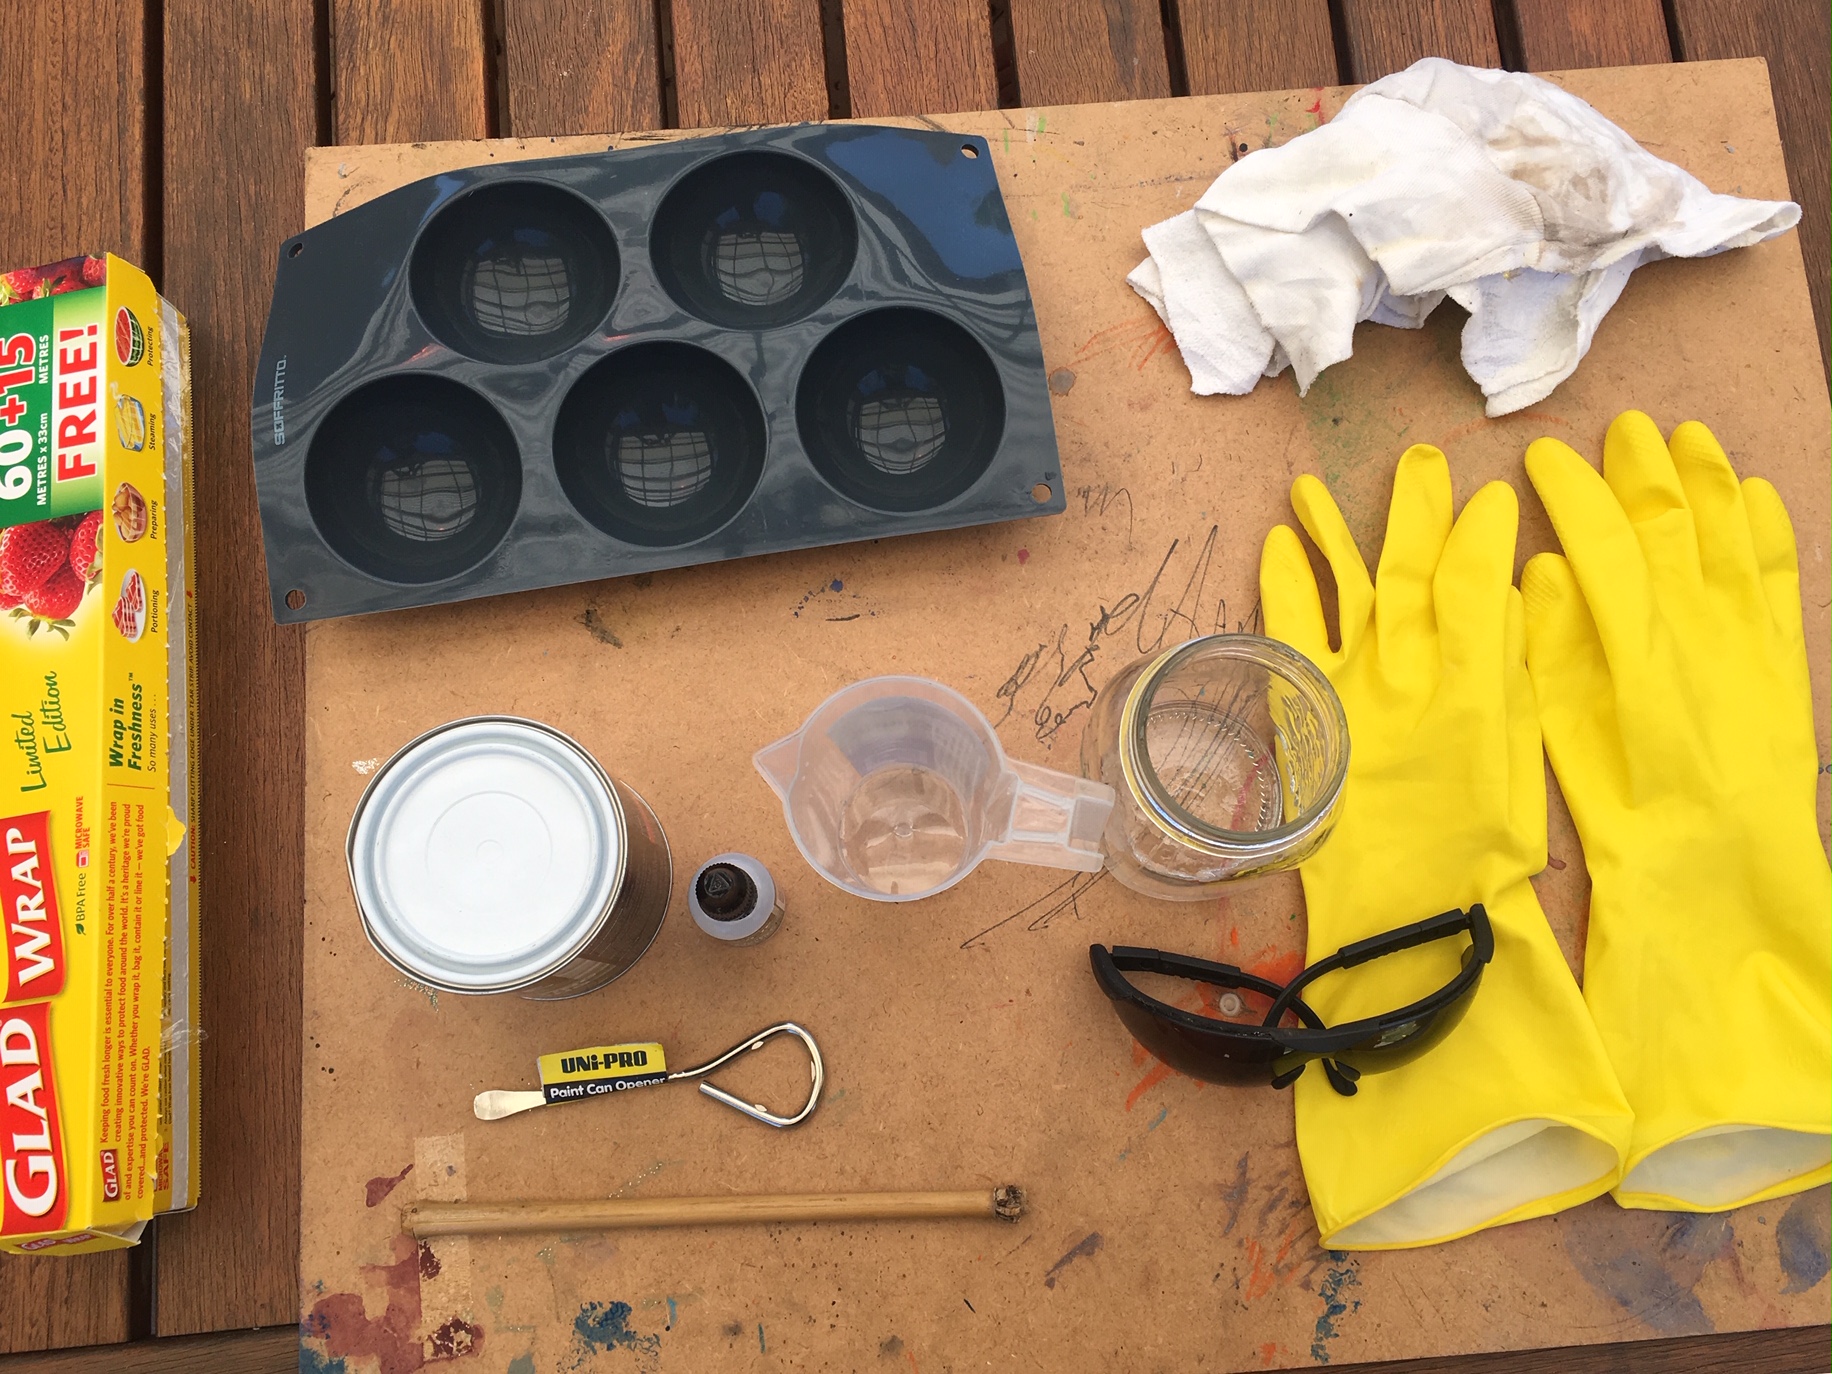
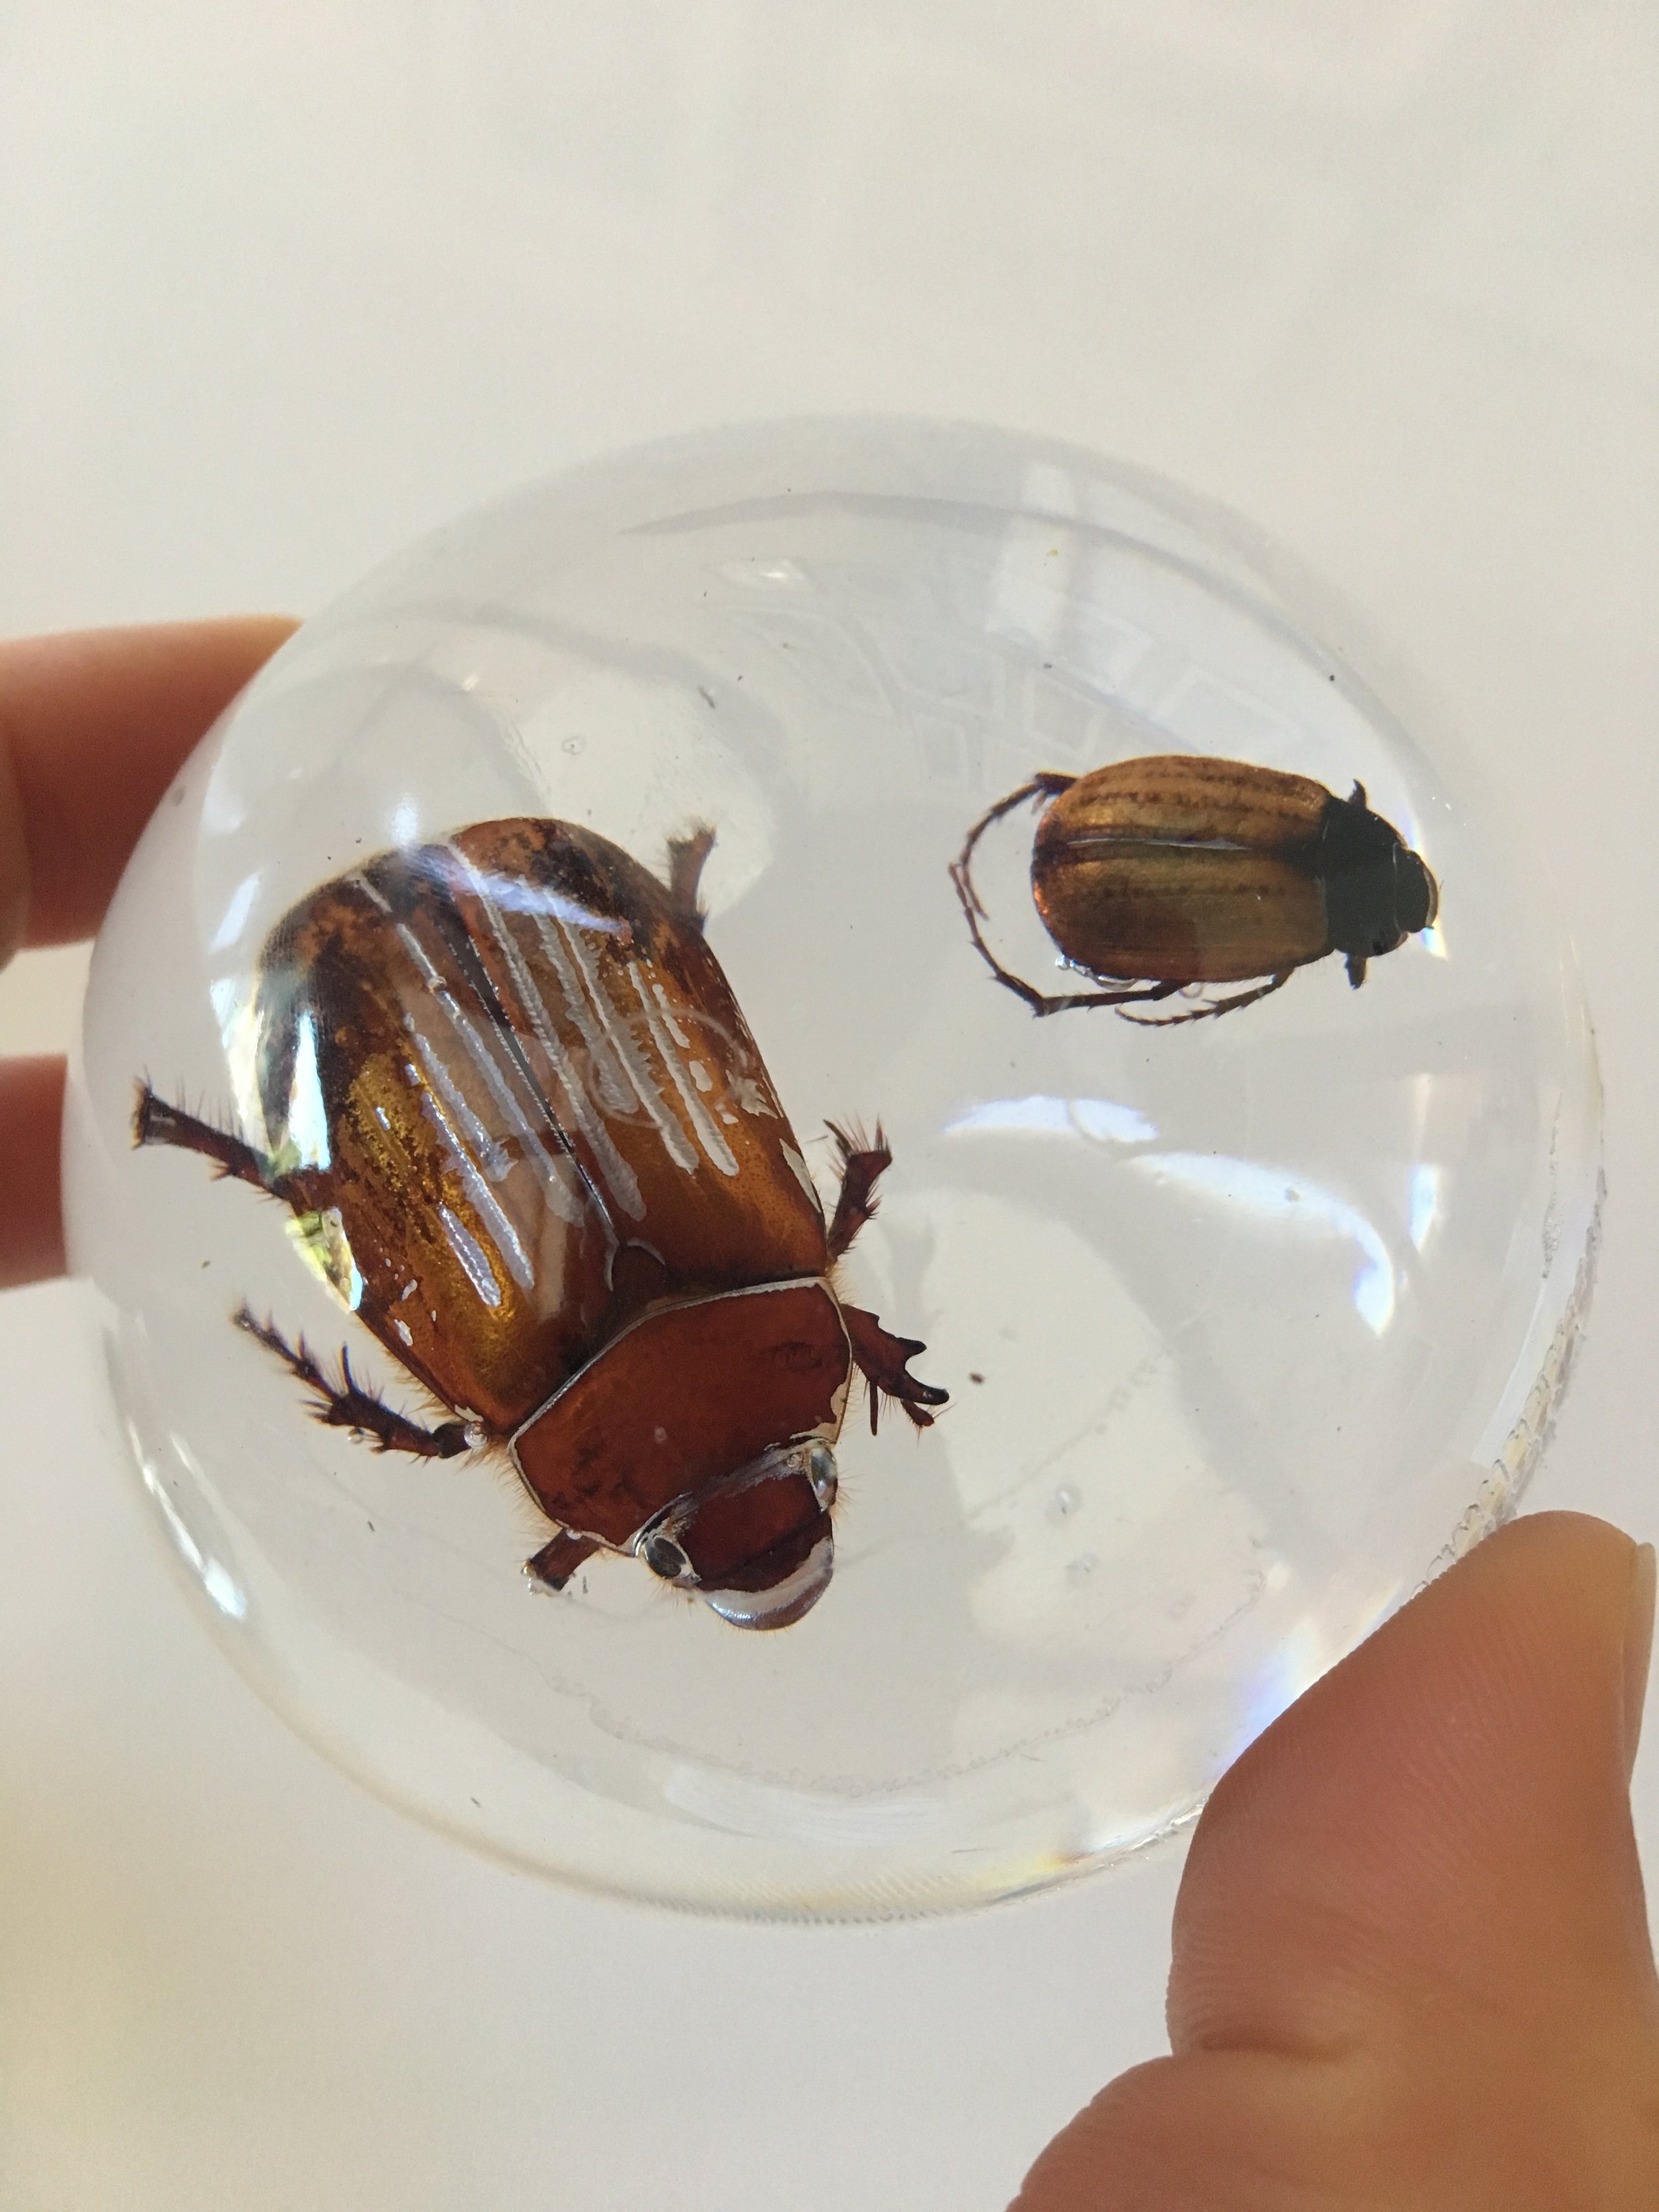
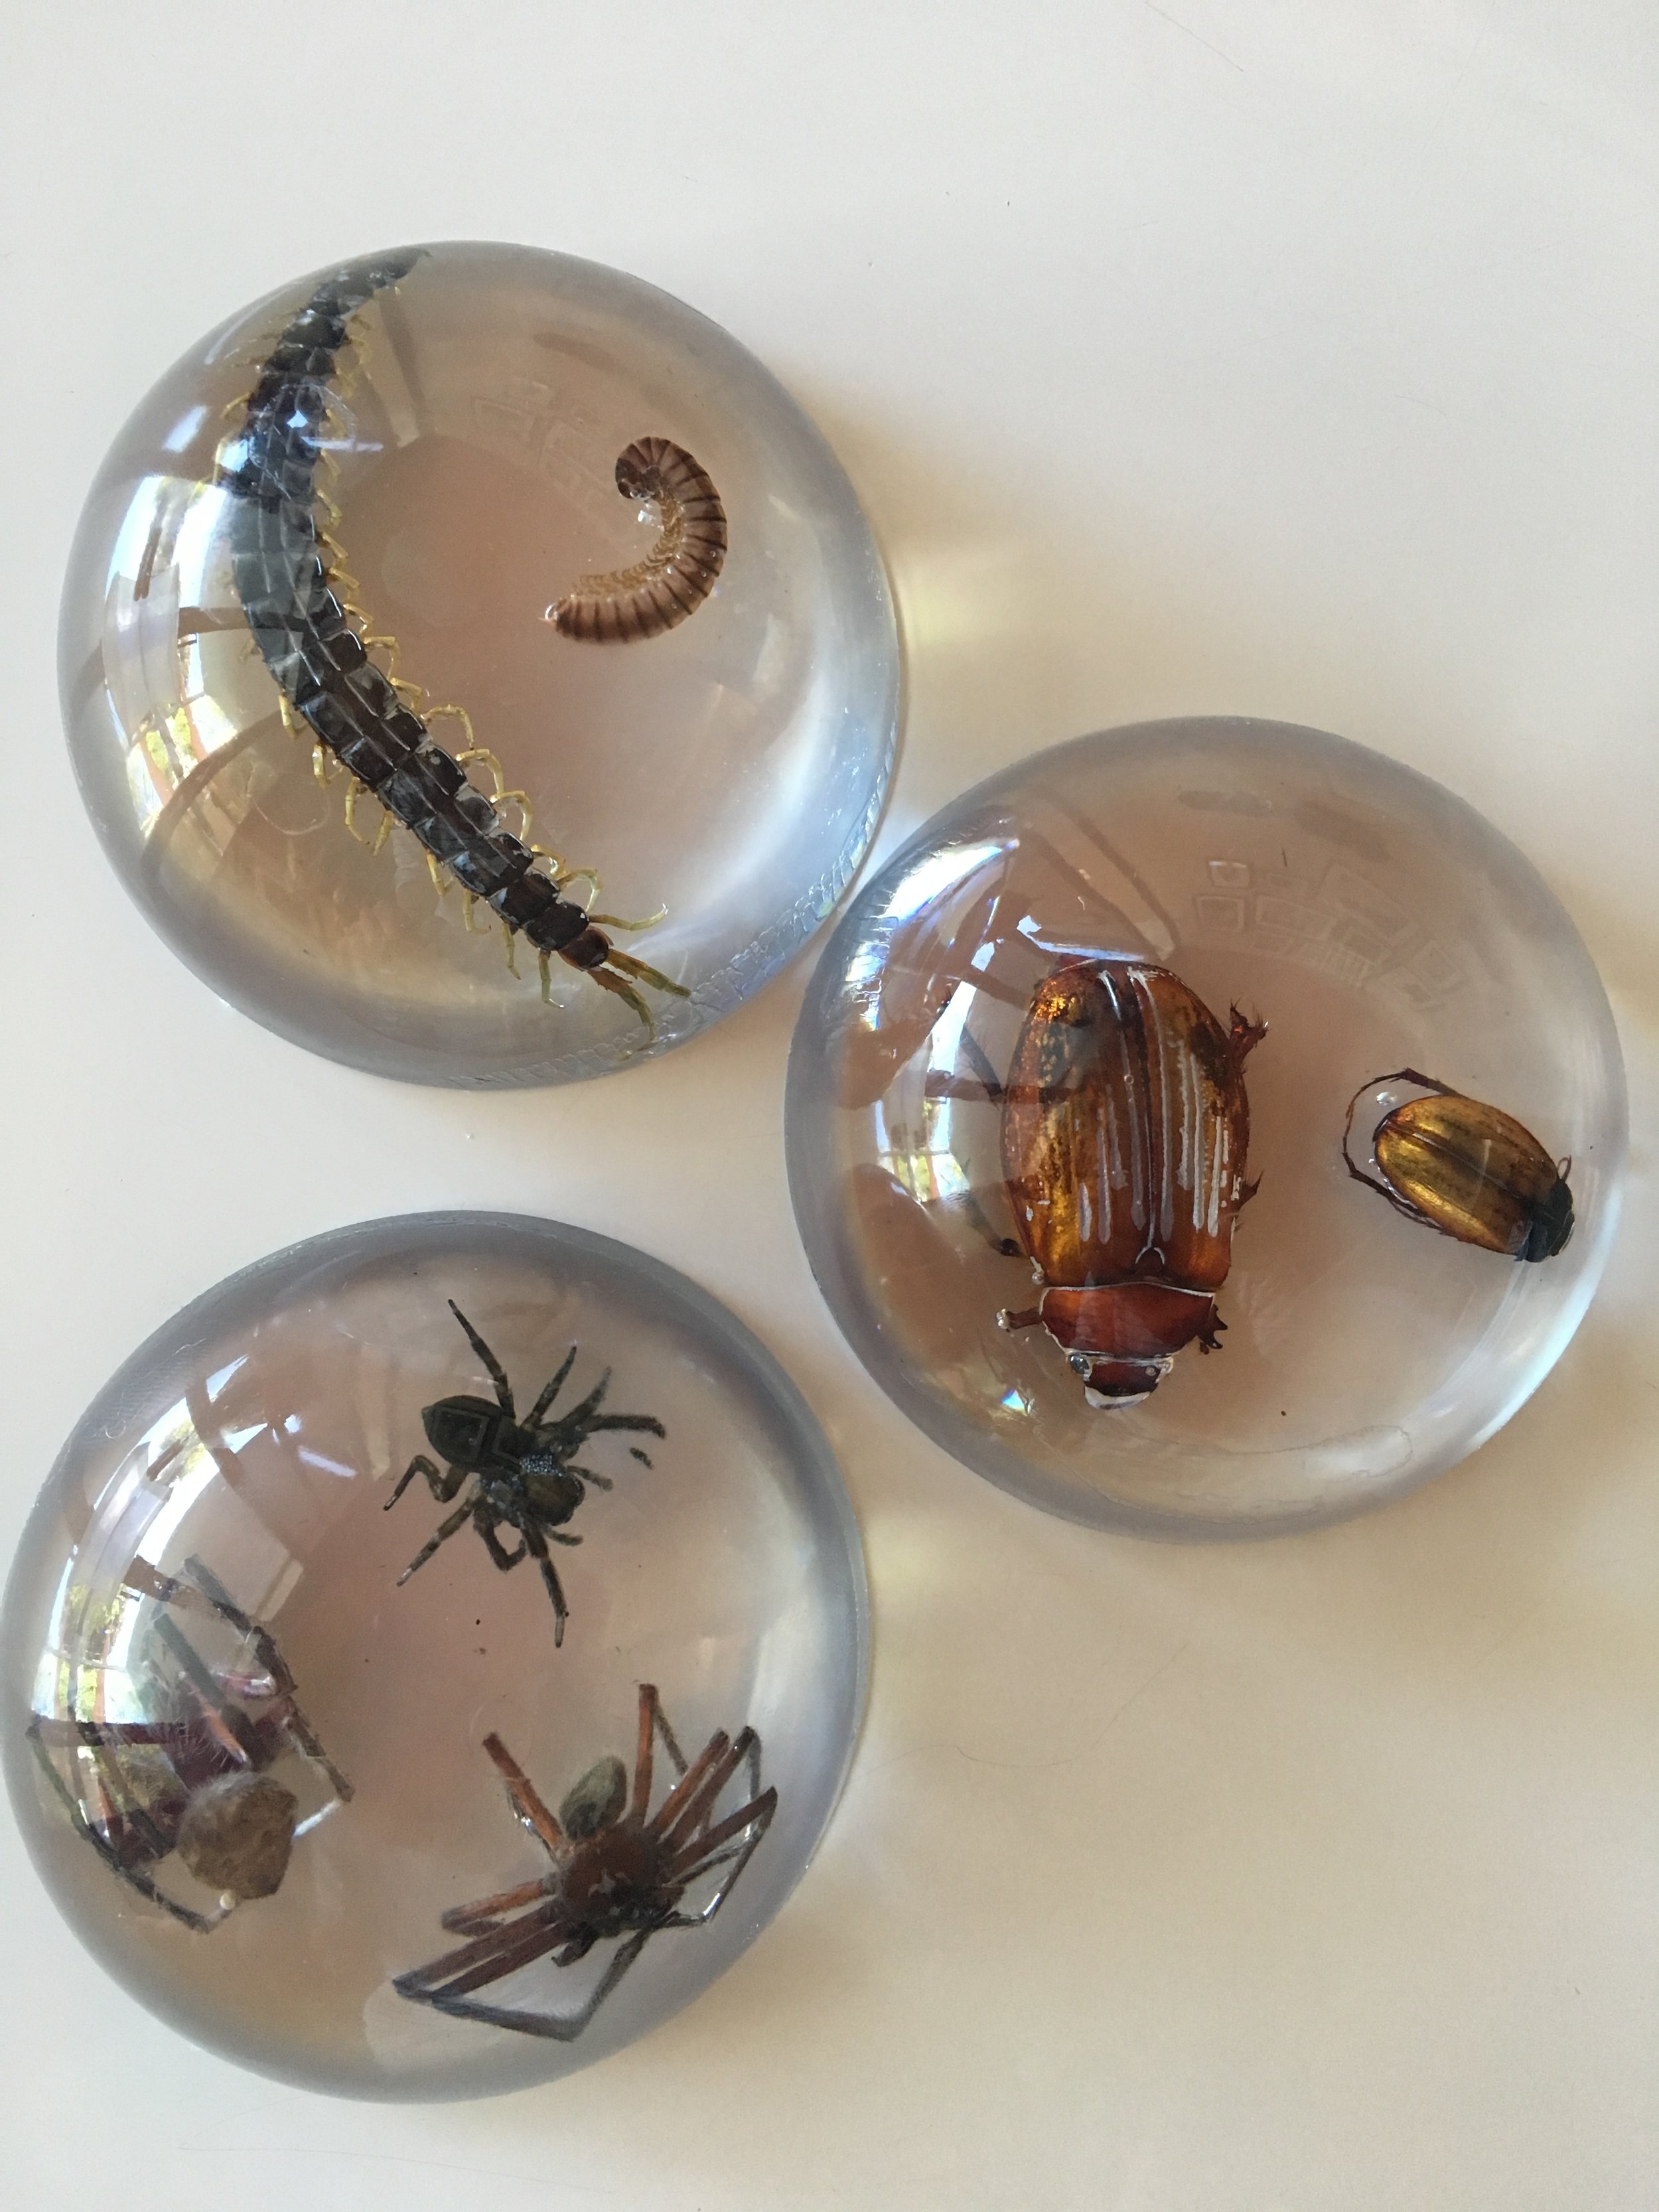
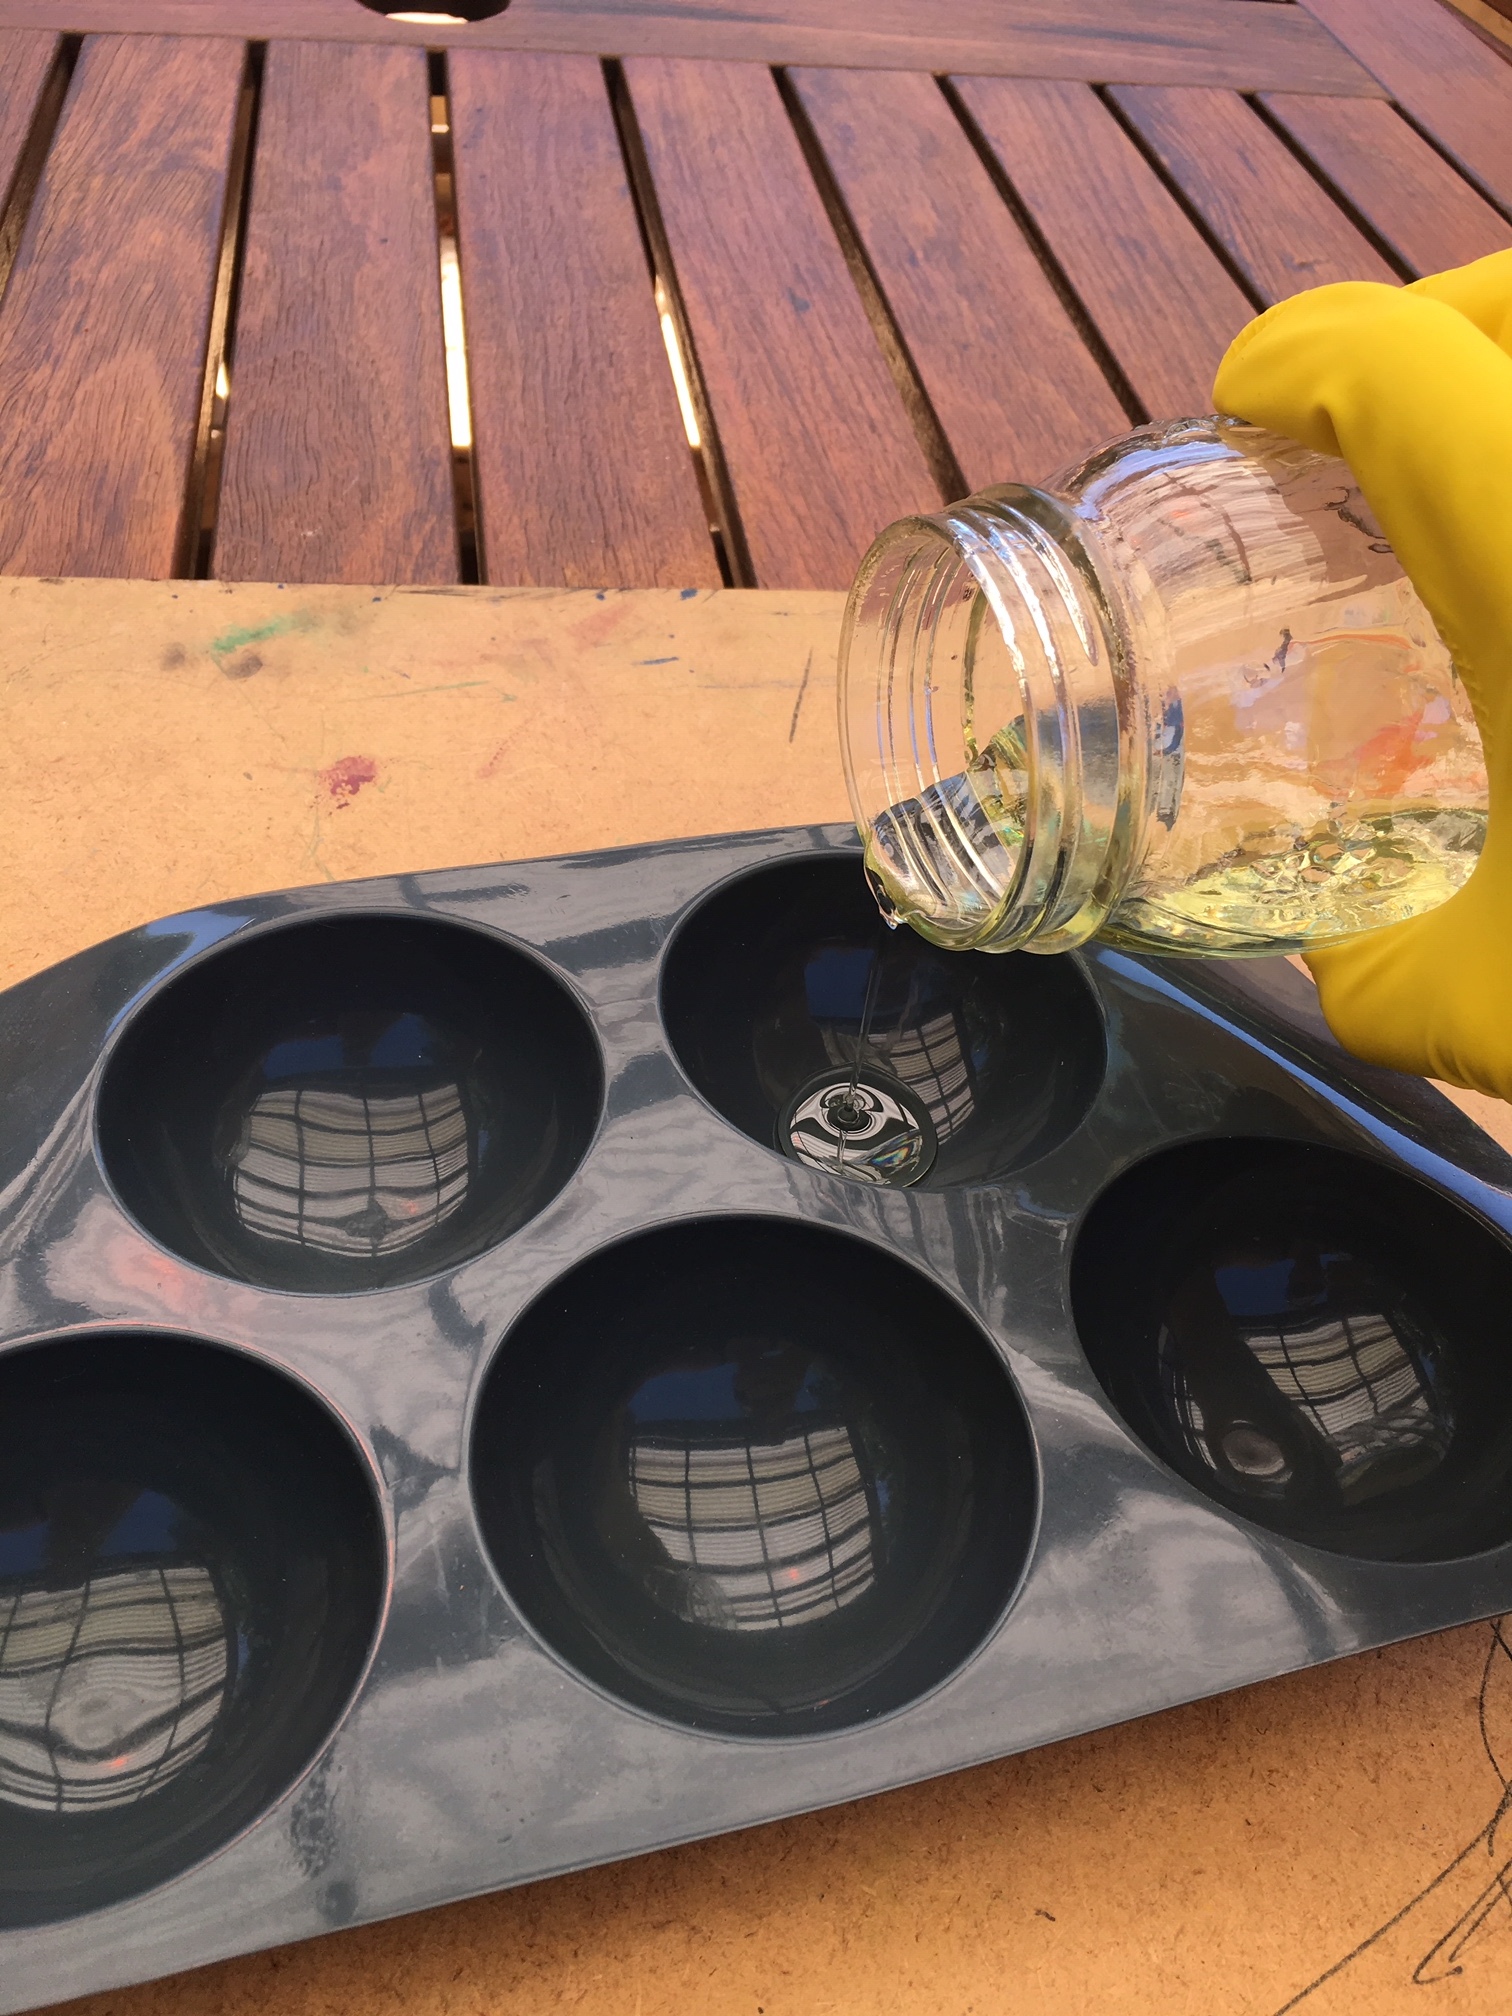
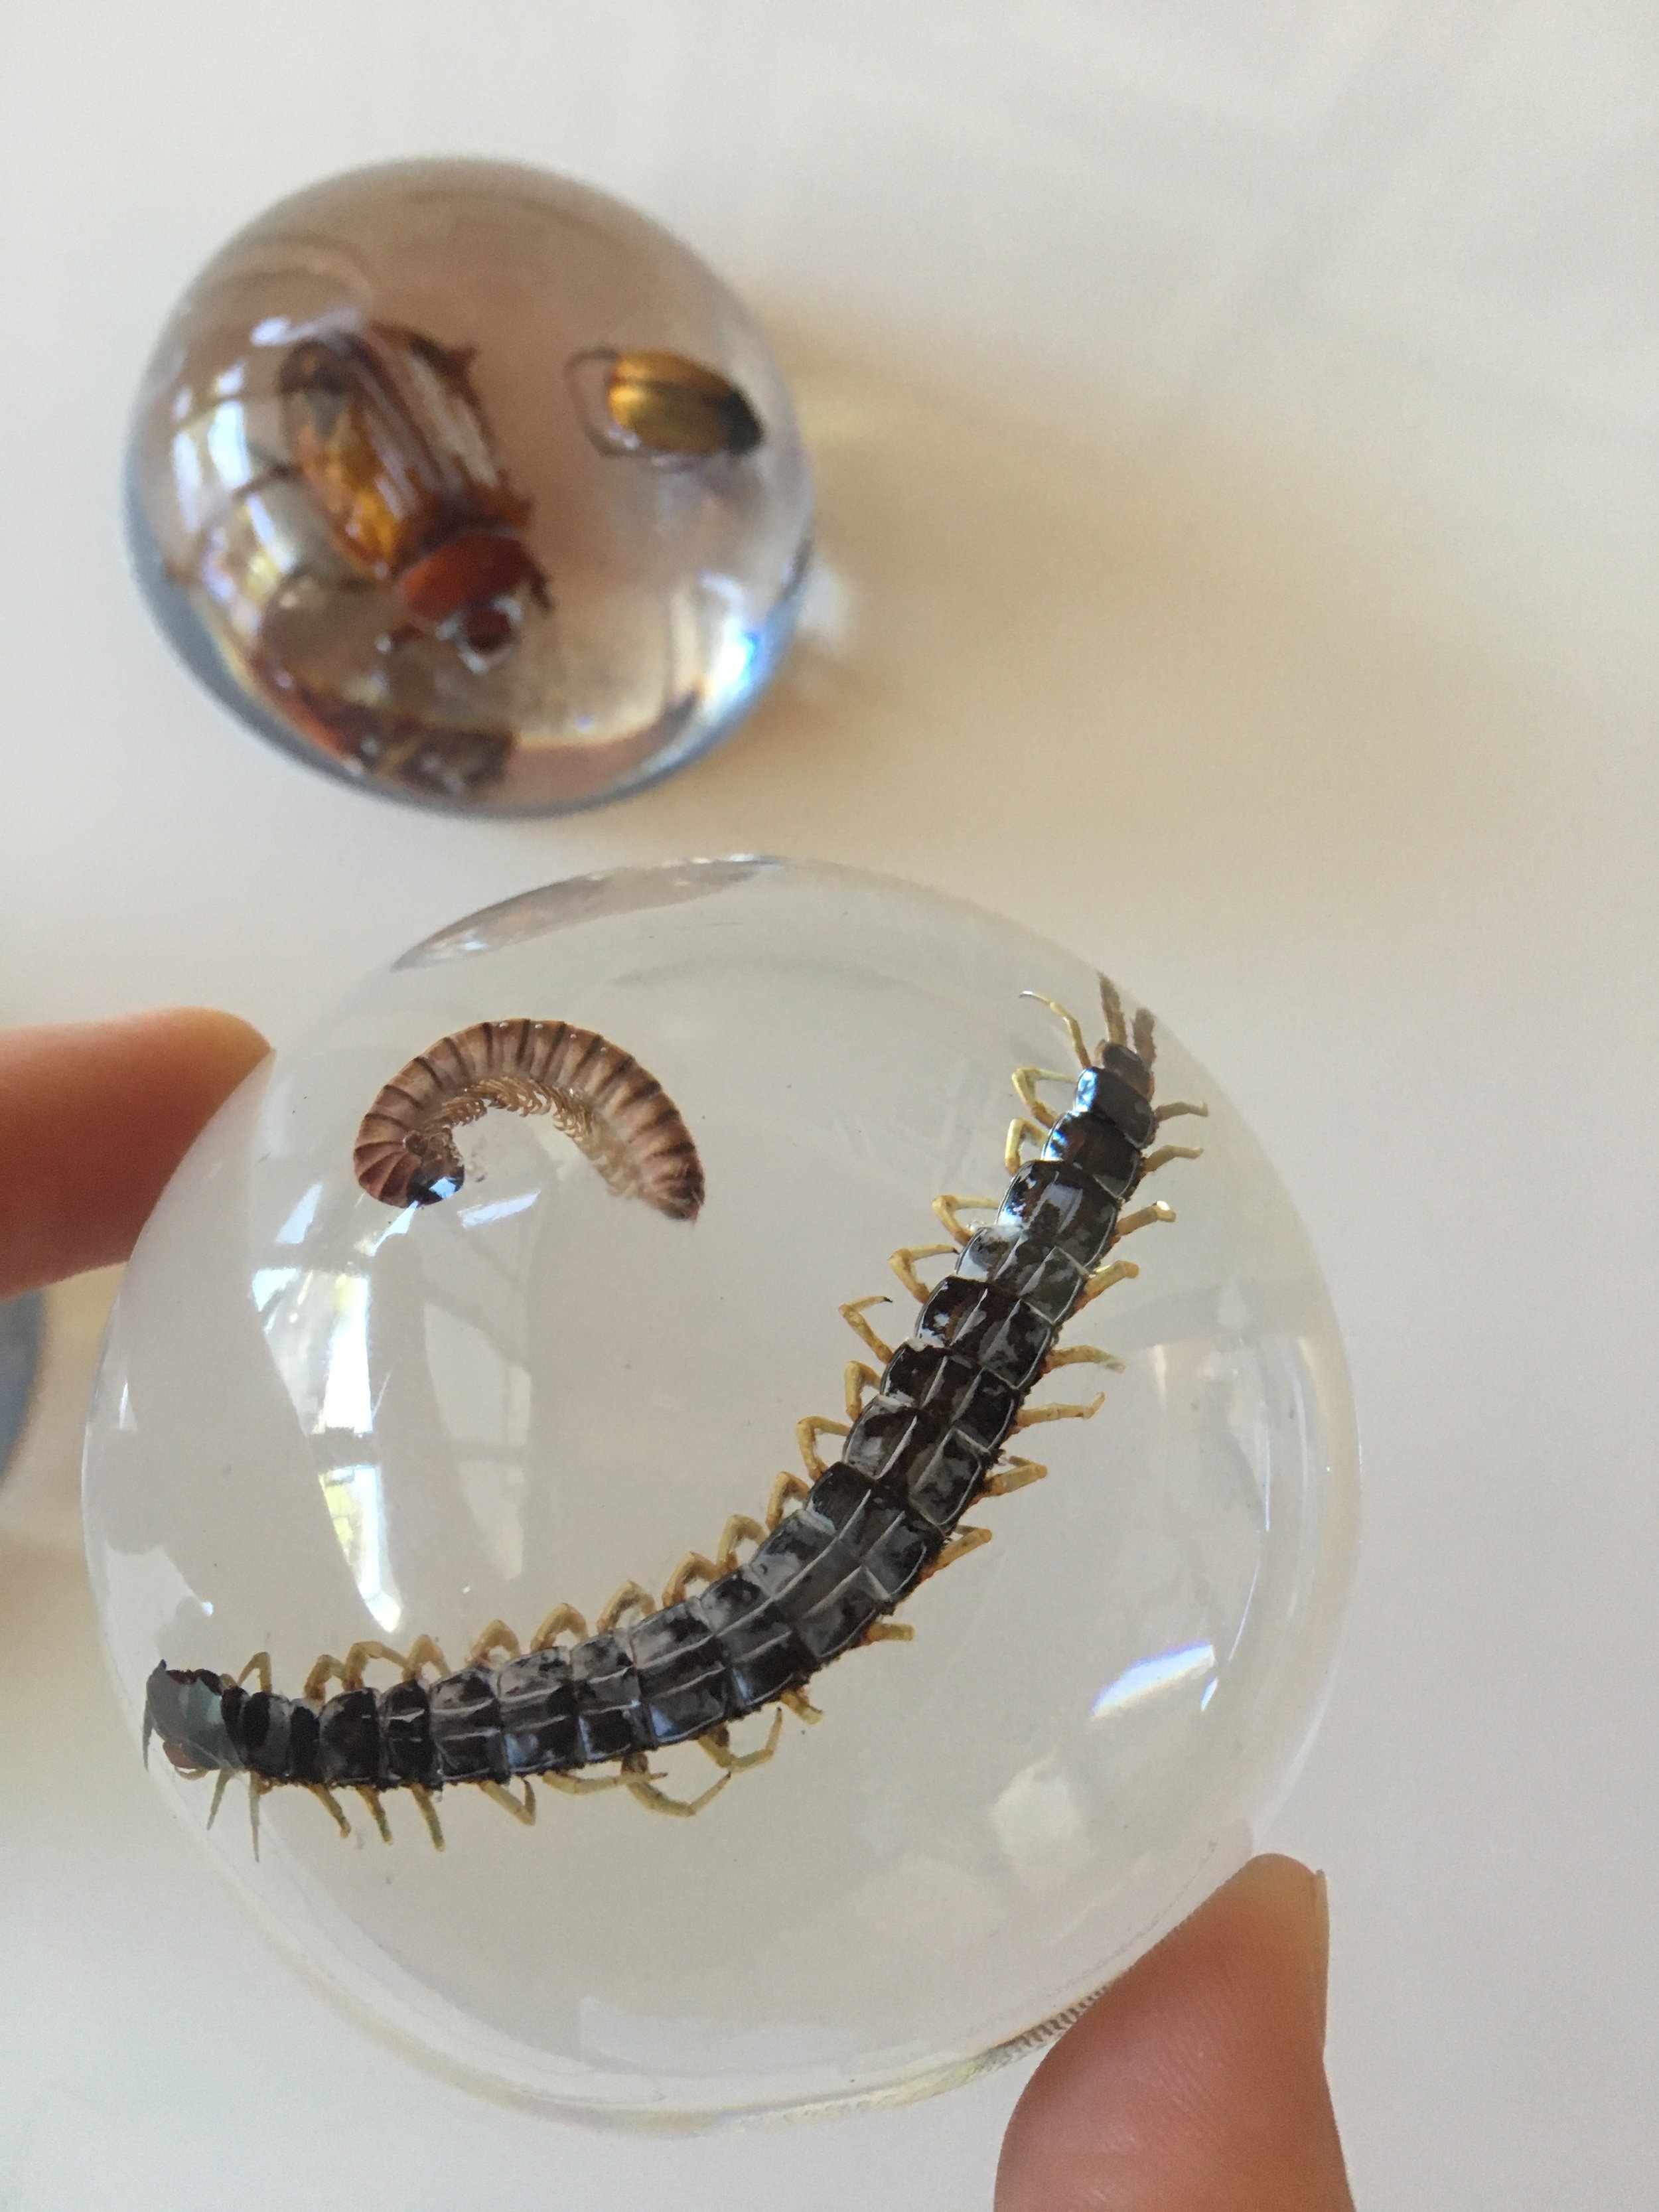
MOULD: The resin gets hot as it sets, so not all plastic containers are suitable. I found silicone to be the best. We bought silicone cake moulds from a baking shop, the half dome shape gives a smooth, fantastic finish and magnifies the bug when you view it from above.
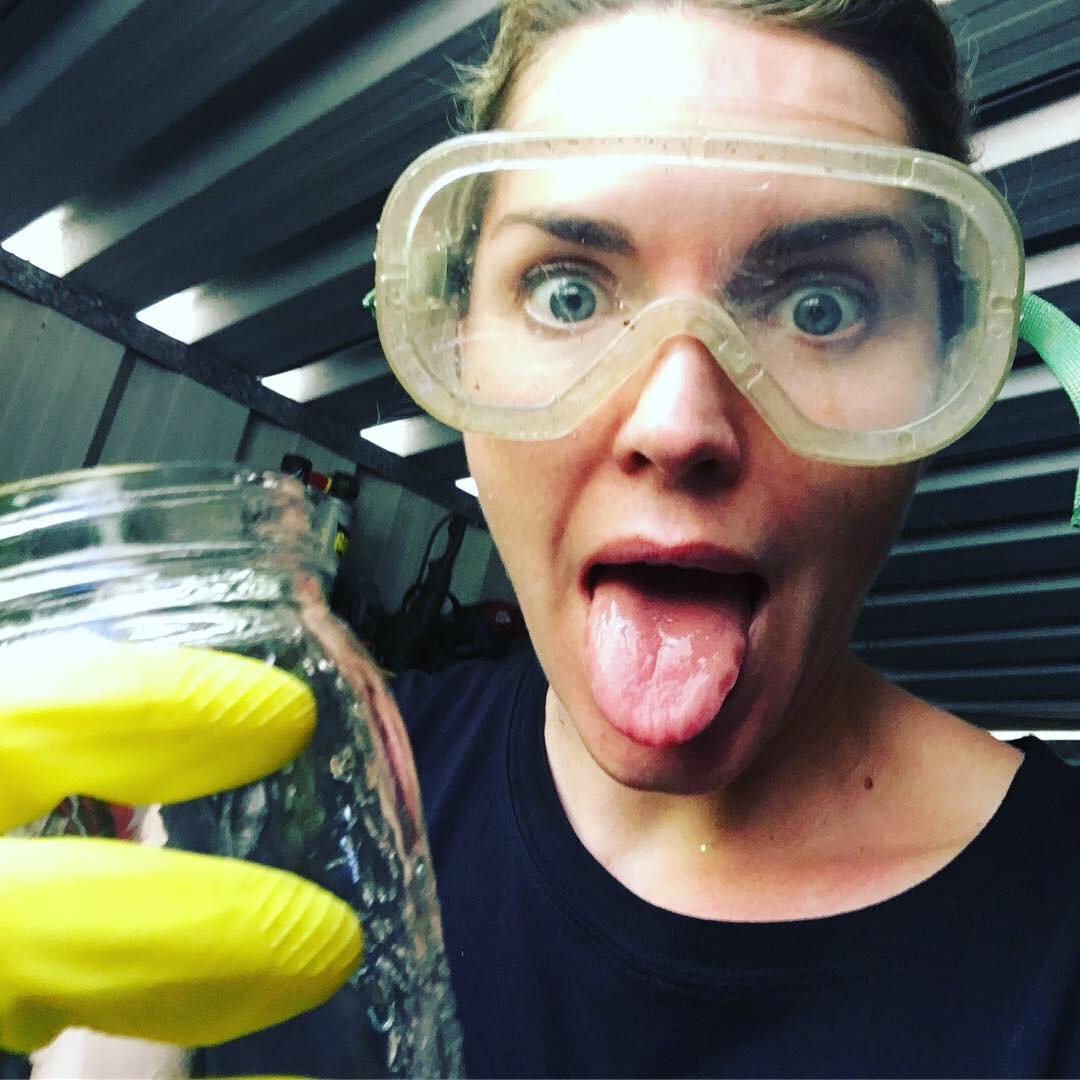
SAFETY GEAR: You will need gloves and safety goggles and a well ventilated area. Do not skip any of these precautions! Resin is classified as possibly carcinogenic.
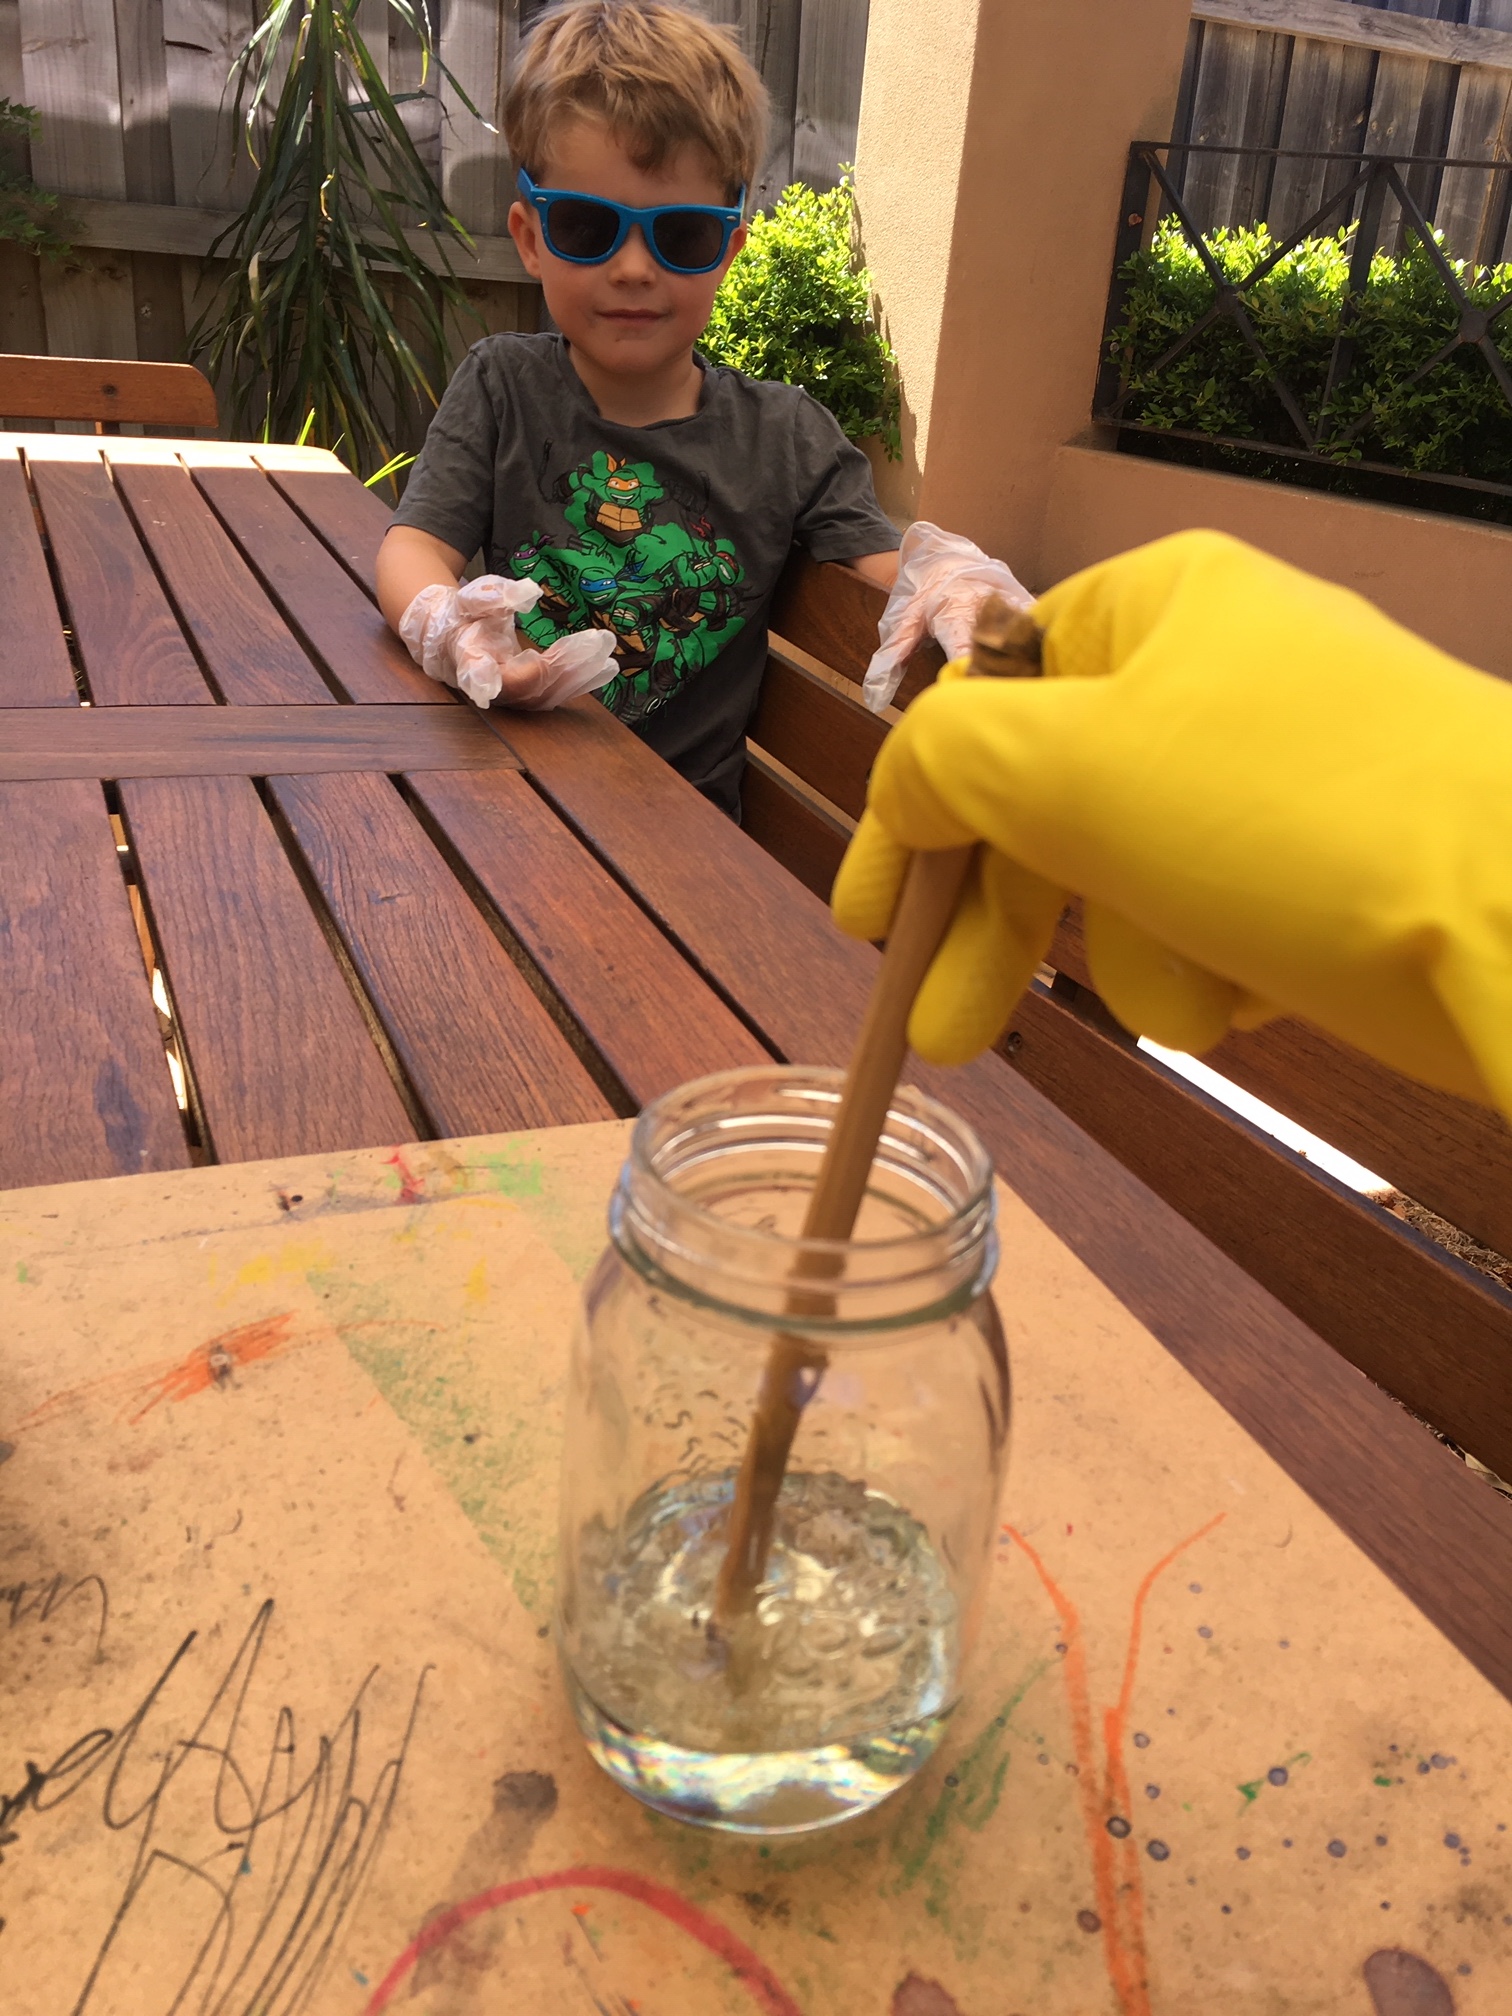
My kids stood two metres back and watched me mix the chemicals. I wore safety gear and did not allow them to pour, touch or stir the resin. Working outside is best as the fumes are strong, but make sure it’s not too windy or all your bugs will blow away!
OTHER GEAR: You will also need a rag, stirring stick and glass jar to mix the resin in.

Here’s how to do it:
First you need to work out how much resin you will need for each pour and then calculate how many drops of catalyst to add. The ratio will be on the tin’s instructions. Keep in mind, we had three layers of resin for each paperweight. This sets the insect in the centre and stops it floating or sinking.
To measure, I poured water a third of the way up each mould, then tipped it into a measuring jug to see how many millilitres it was. I calculated that I would need 41 drops of catalyst. It’s important to put the exact number of drops in so the resin will set enough, but not so hard that it cracks.
I then poured that same water into my glass mixing jar and used a permanent marker to mark the level. (Dry the jar before continuing)From here, we basically followed the instructions on the tin of resin.
Put on your safety gear, open the tin and pour resin into the mixing jar up to the level marked. Tightly reseal the tin, then get the kids (sitting a few meters away) to help you count out the drops of catalyst. They will love watching the resin change from clear to slightly yellow as you stir (insert science lesson here). Stir for two minutes to make sure it mixes well.Pour the mixed resin into your moulds. Cover with something to stop dust blowing in. Wait until the surface becomes tacky (approx 40 min) before placing the insect on top. This will stop the insect sinking or moving. Don’t wait too long though or you will see a layer / line in your finished paperweight.
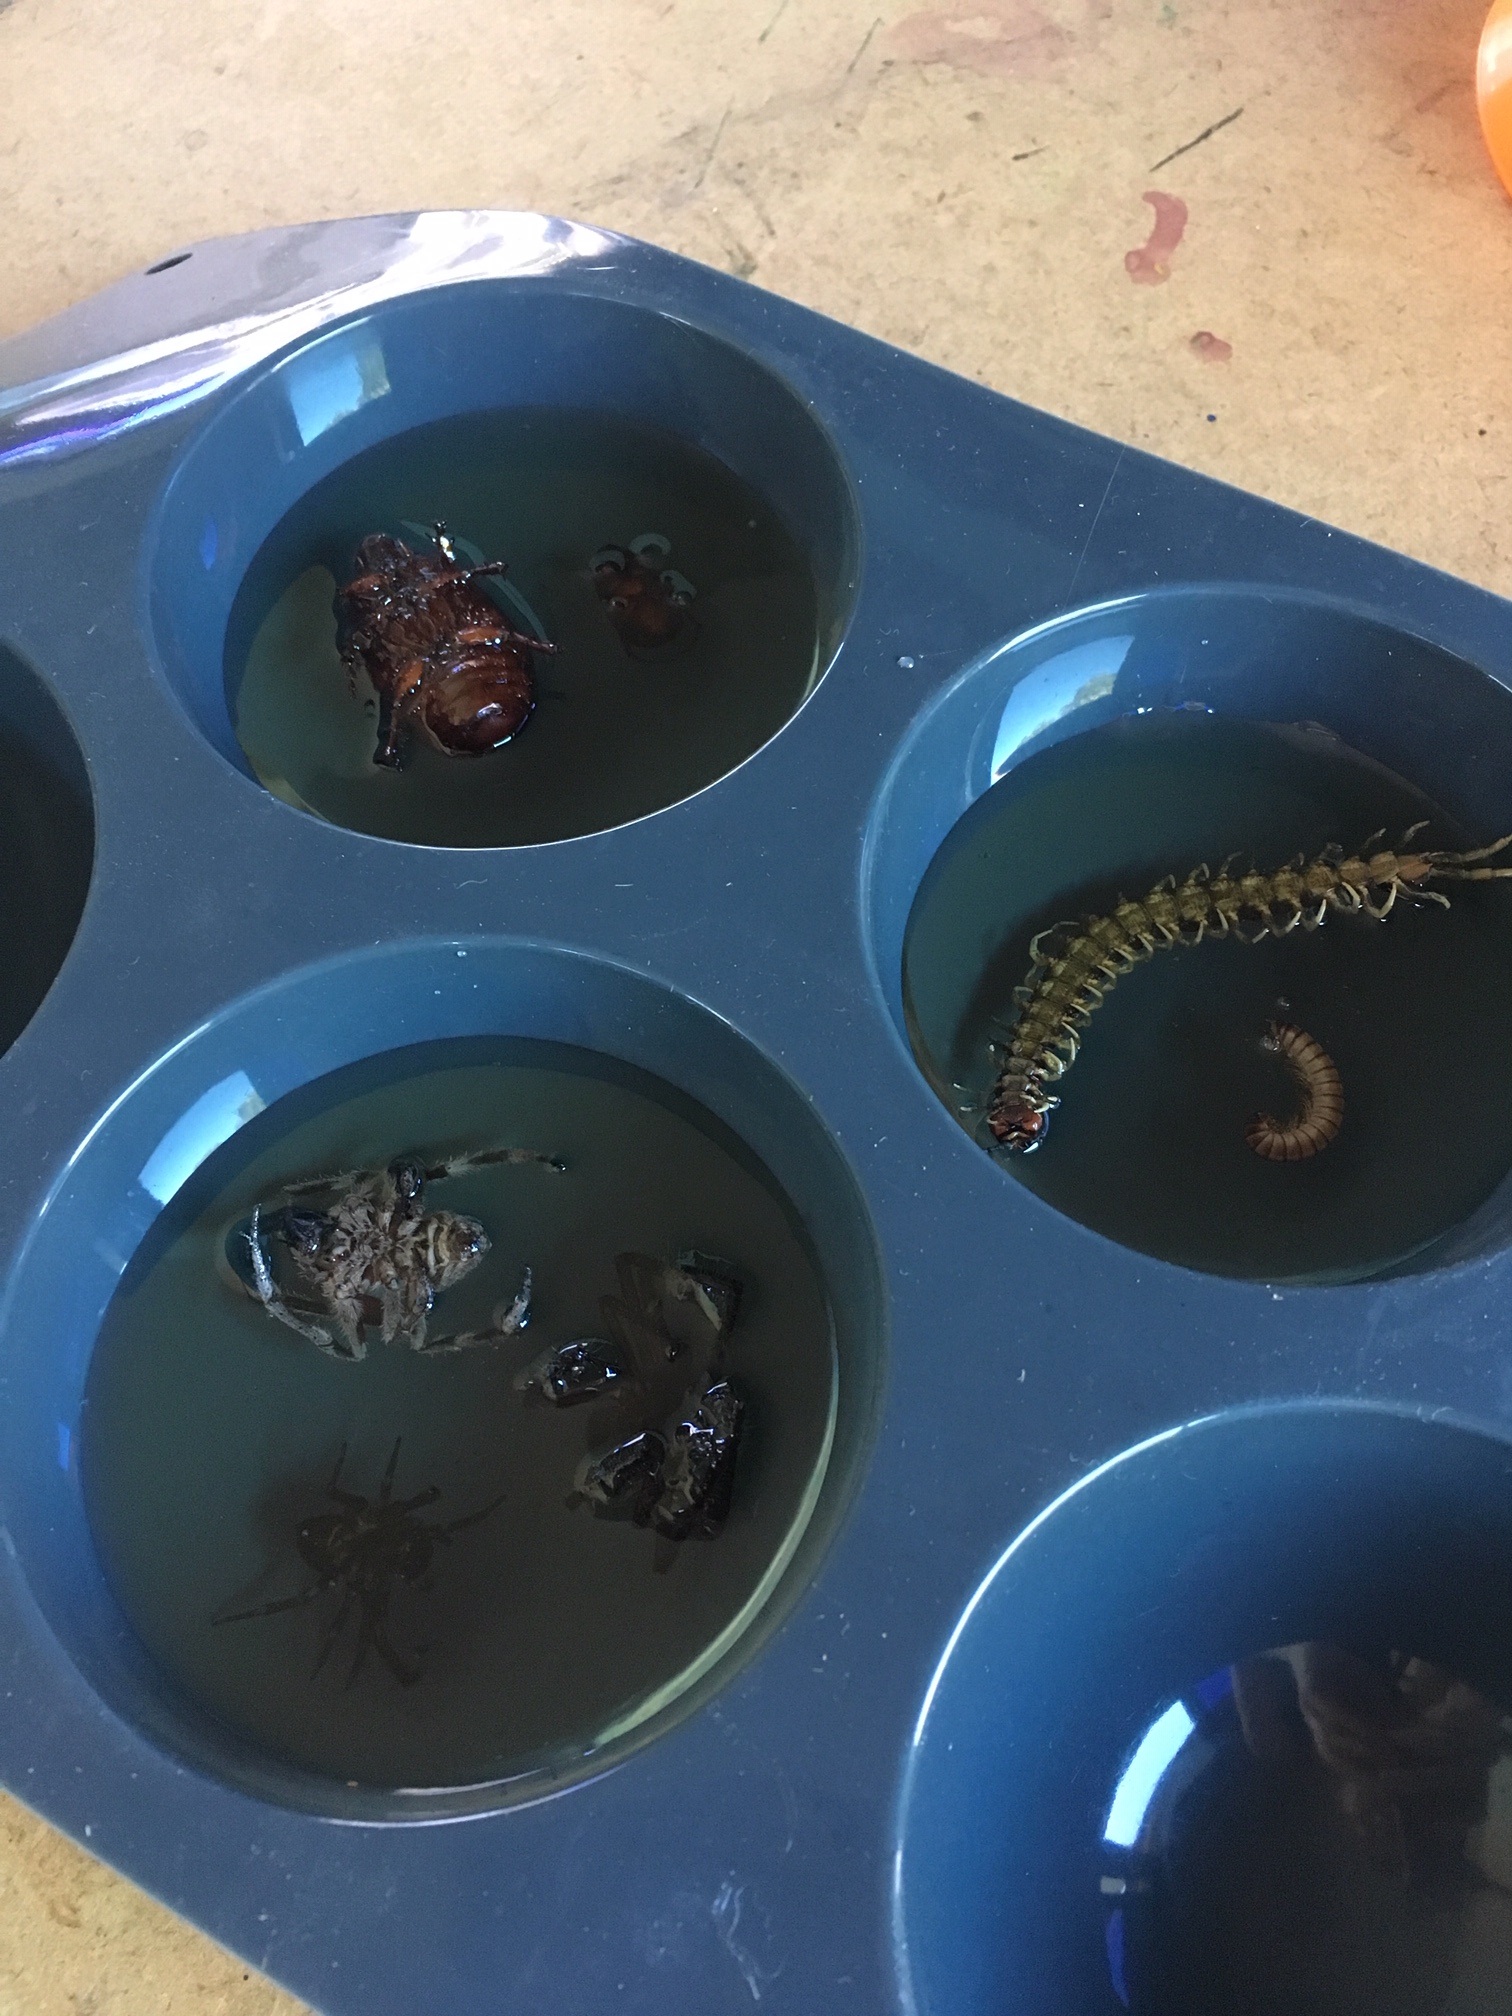
Once the surface is tacky, place your insect in upside down. Remember the bottom of the mould will be the top of the finished paperweight. Mix and pour your second layer of resin. Again wait until that layer becomes tacky.
Mix and pour your third and final layer, completely covering the insect.
Wait for it to cure. The tin suggested 24 hours, but I found ours needed 2 days to set before handling them. Otherwise finger marks would mark the surface.
Pop them out and play!
You will need to be home for half a day to make these and then wait two days for the resin to set.
You could try casting all sorts of other things too. We put a bright purple flower in one underneath a bee … and like magic the flower turned white! I think this was due to the heat of the resin, someone has since suggested we try dried flowers next time.
Hmmm … now what will we cast next?